Have you ever scrolled through Instagram and noticed that iPhone photos just pop more? The colors seem more alive, the contrast is just right, and the image has this clean, crisp look. That’s the magic of the iPhone Vivid Filter — and guess what? You can absolutely recreate that same vibe on your Android device.
What is the iPhone Vivid Filter?
The Vivid Filter is one of Apple’s Photographic Styles, introduced with iOS 15. It enhances your pictures by boosting brightness, color saturation, and contrast while maintaining realistic skin tones. The result? A professional-looking photo without lifting a finger.
Why Do Android Users Want It?
Because it looks stunning! It gives dull images life. And while Android cameras are powerful, they don’t always offer the same “straight-out-of-camera” look that iPhones do. The good news is: with a little tweaking and the right tools, you can replicate — or even enhance — that same effect.
Understanding the Vivid Filter
What Makes the Vivid Filter Unique?
Unlike traditional filters that just slap on a color layer, the Vivid filter changes multiple image components like midtone contrast, vibrancy, and luminance adjustments. It looks polished, not processed.
How It Enhances Photos
-
Boosts Color Saturation: Without overblowing reds or blues.
-
Sharpens Details: Adds clarity while retaining natural texture.
-
Balances Skin Tones: So you don’t end up looking like a carrot.
Color Grading and Contrast Levels
It’s not just brighter — it’s balanced. Highlights are lifted, shadows deepened slightly, and whites cleaned up for a high-end look.
iPhone vs Android Photo Processing
Apple’s Computational Photography
Apple’s smart image pipeline handles things like tone mapping, Smart HDR, and Deep Fusion — automatically. That’s why even casual photos look professional. Learn more about Apple’s Smart HDR and its impact on images.
Limitations of Android Camera Software
Android devices often vary in software, resulting in inconsistent image processing. The color balance may vary from brand to brand.
Bridging the Gap With Third-Party Apps
Thankfully, apps like Lightroom Mobile, VSCO, and Snapseed allow Android users to replicate these image styles with manual control or presets.
Best Android Apps to Mimic iPhone Vivid Filter
-
-
Powerful manual tools
-
Custom tone curve support
-
Preset import support
-
-
-
Vivid-like filters like “C1” and “V5”
-
Minimalist interface
-
Custom edits possible
-
-
-
Free app by Google
-
Selective color editing and curves
-
Great HDR-like features
-
-
-
Quick auto-enhance tools
-
Vibrance and sharpness control
-
-
Instagram Built-in Filters
-
“Clarendon”, “Juno”, and “Lark” have vibrant vibes
-
Free and instant edits
-
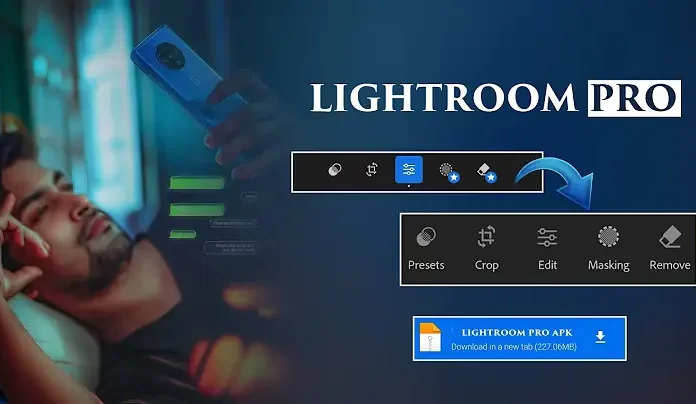
Step-by-Step Guide: Create Vivid Filter Look in Lightroom Mobile
Learn to mimic the iPhone Vivid Filter using Lightroom. If you don’t already have it, download it here.
-
Import Your Photo
-
Adjust Exposure and Contrast
-
Boost Vibrance and Slight Saturation
-
Use Tone Curve to Create Soft ‘S’ Shape
-
Save as a Preset for Later
More Lightroom tips? Check this tutorial by Adobe.
Using Presets to Speed Up the Process
Where to Find Free Presets
How to Import in Lightroom
Check Adobe’s official guide here
Manual Filter Creation for Advanced Users
Explore editing on your own:
-
Use HSL to Adjust Specific Tones
-
Create Custom Tone Curves
-
Use Selective Tools to Boost Certain Areas
Advanced tips available on Photography Life’s HSL guide.
Apps That Offer iPhone-Like Filters Out of the Box
-
NOMO Cam – Film-style filters
-
Prequel App – AI filters and vibrant tones
-
Lensa – AI photo enhancer with one-tap vivid settings
Tips to Capture Better Photos on Android
-
Use Pro Mode (Manual Settings)
Learn how on Android Authority -
Shoot in RAW – For better editing flexibility
-
Use Golden Hour Light – Golden Hour Calculator
Common Mistakes When Applying Filters
-
Over-Editing Can Kill the Vibe
-
Too Much Contrast or Saturation Looks Fake
-
Pay Attention to Skin Tones
Sharing on Social Media
Want to retain quality when uploading? Use:
-
Telegram for uncompressed sharing
-
Export with 2048px resolution and 100% quality JPEG
How to Maintain Photo Quality When Editing
-
Export in full resolution
-
Use PNG for crystal-clear images (especially for graphics)
More here: JPEG vs PNG Guide
Advantages of Using Custom Filters
-
Visual Consistency
-
Saves Time for Batches of Edits
-
Builds Your Visual Brand
If you’re a content creator, check out Canva’s Filter Tools too.
Final Thoughts
You don’t need an iPhone to create jaw-dropping vivid photos. With the right apps and a bit of patience, your Android can deliver equally stunning results — maybe even better. So the next time someone tells you “iPhone photos just look better,” smile, open Lightroom, and prove them wrong!
FAQs
1. Can I use iPhone filters directly on Android?
Not directly, but you can recreate them using Lightroom, VSCO, or Snapseed.
2. Are Lightroom presets free?
Yes! Try PresetLove or Photonify.
3. Which app is closest to iPhone camera?
Google Camera app (GCam) is close. Try downloading it from XDA Developers.
4. Will using vivid filters reduce photo quality?
No — if you export in high resolution and avoid excessive edits.
5. Can these filters work on videos?
Yes, with apps like CapCut or VN Video Editor.